
Nginx从入门到精通
本文为尚硅谷nginx视频学习视频,视频页面https://www.bilibili.com/video/BV1yS4y1N76R
一、基础篇
四大版本区别
- Nginx开源版 https://nginx.org/
- 纯原生,额外功能少,二次开发麻烦
- Nginx push 商业版 https://www.nginx.com/
- 商业版本,需要付费
- Openresty 完全开源,基于 Nginx 与 Lua 整合 https://openresty.org/cn/
- 以Lua脚本进行扩展
- Tengine 淘宝基于nginx增强开源版 https://tengine.taobao.org/
- 以C语言进行扩展模块化开发
开源版安装和使用
下载最新版
wget http://nginx.org/download/nginx-1.21.6.tar.gz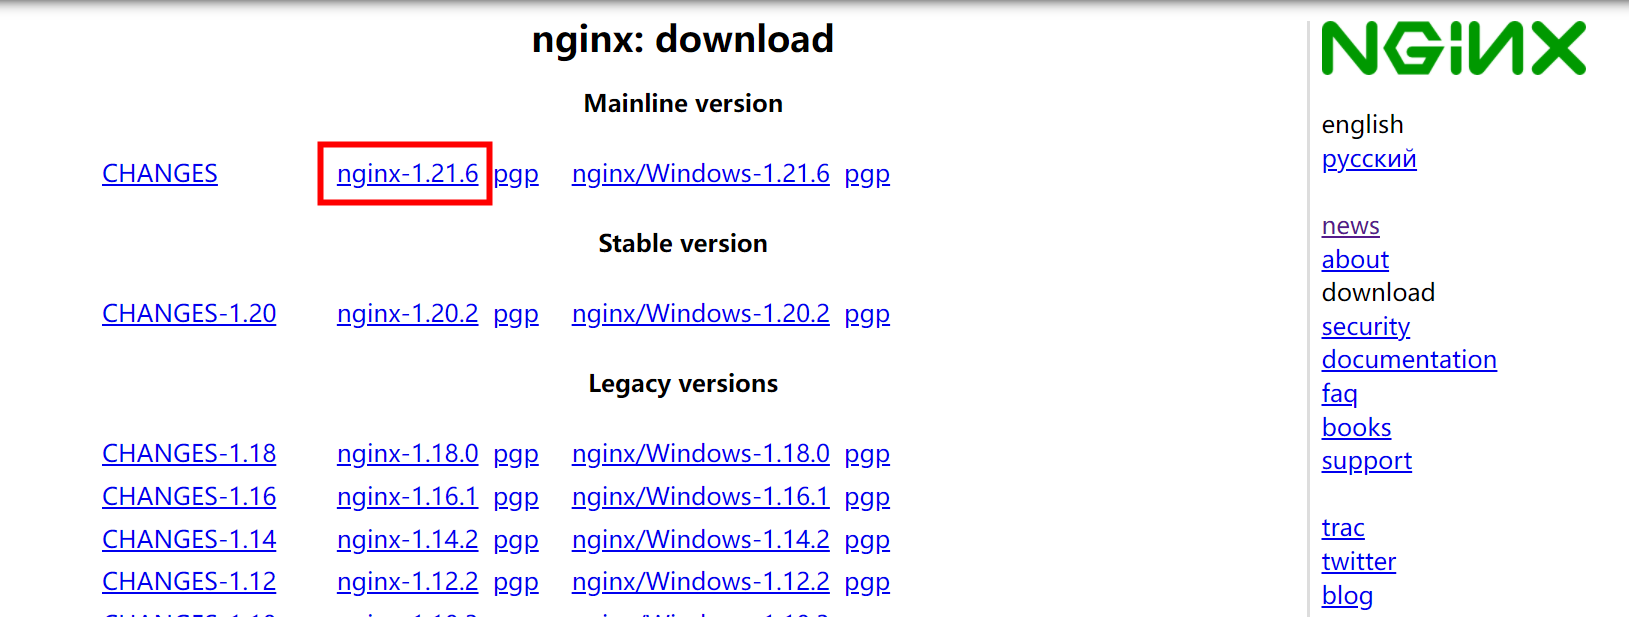
解压
1
2
tar -zxvf nginx-1.21.6.tar.gz -C /opt/module/
mv /opt/module/nginx-1.21.6/ /opt/module/nginx/编译
1
2
3
4进入目录
cd /opt/module/nginx/
编译命令 --prefix指向安装路径
./configure --prefix=/usr/local/nginx报错1,缺少C语言编译组件
1
2
3
4
checking for OS
+ Linux 3.10.0-957.el7.x86_64 x86_64
checking for C compiler ... not found
./configure: error: C compiler cc is not found解决方法
yum install -y gcc gcc-c++报错2,缺少PCRE 库
1
2
3
4
./configure: error: the HTTP rewrite module requires the PCRE library.
You can either disable the module by using --without-http_rewrite_module
option, or install the PCRE library into the system, or build the PCRE library
statically from the source with nginx by using --with-pcre=<path> option.解决方法
yum install -y pcre pcre-devel报错3,缺少 zlib库
1
./configure: error: the HTTP gzip module requires the zlib library.
解决方法
yum install -y zlib zlib-devel编译
make安装
make install执行完成该命令后可以看到
/usr/local/nginx文件夹,执行/usr/local/nginx/sbin/nginx启动基本使用
检查防火墙状态
systemctl status firewalld.service基本命令
1
2
3
4
5
./nginx #启动
./nginx -s stop #快速停止
./nginx -s quit #优雅关闭,退出之前完成以及接受的请求链接
./nginx -s reload #优雅的重新加载配置文件
./nginx -t #检查配置文件语法配置nginx随机器开机启动
创建文件
vim /usr/lib/systemd/system/nginx.service文件内容如下:
1
2
3
4
5
6
7
8
9
10
11
12
13
14
[Unit]
Description=nginx - high performance web server
Documentation=http://nginx.org/en/docs/
After=network.target
[Service]
Type=forking
ExecStart=/usr/local/nginx/sbin/nginx
ExecReload=/usr/local/nginx/sbin/nginx -s reload
ExecStop=/usr/local/nginx/sbin/nginx -s stop
PrivateTmp=true
[Install]
WantedBy=multi-user.target相关命令
1
2
3
4
5
6
7
8
9
10重新加载系统服务
systemctl daemon-reload
检查是否启动
systemctl status nginx
启动nginx
systemctl start nginx
关闭nginx
systemctl stop nginx
配置开机自启动
systemctl enable nginx.service
文件结构介绍
目录文件如下,所有
_temp都是运行后产生的1
2
3
4
5
6
7
8
9
10
11
12
13[root@shuo nginx]# ll
client_body_temp
conf # 核心配置文件,最主要的配置文件是nginx.conf,里面会应用其余配置文件
fastcgi_temp
html # 静态资源
logs # 日志
|-access.log # 所有请求日志,注意会把磁盘写满
|-error.log # 错误日志
|-ngingx.pid # 主进程ID
proxy_temp
sbin # 启动关闭命令
scgi_temp
uwsgi_temp基本运行原理
sbin/Nginx启动会开启一个Master主进程,主进程读取配置文件,先进行校验,校验没问题开启子进程worker,由子进程进行接受请求干活。nginx是一个多进程结构(不是简单的多线程)。
1
2
3[root@shuo nginx]# ps -ef | grep nginx
root 1013 1 0 23:11 ? 00:00:00 nginx: master process /usr/local/nginx/sbin/nginx
nobody 1014 1013 0 23:11 ? 00:00:00 nginx: worker process用户通过网络发送请求到nginx监听的端口。
子进程读取配置文件解析站点,根据请求去本地文件里面加载相关文件。
Nginx配置基础
最小配置文件,原生文件删除所有注释
1
2
3
4
5
6
7
8
9
10
11
12
13
14
15
16
17
18
19
20
21
22
23
24
25
26
27
28
29
30
31
32
33
34
35
36
37
38
39
40
41
42# 工作进程个数,默认为1,可以配置为CPU物理核心数,
worker_processes 1;
events {
# 每个工作进程最多支持多少链接,默认1024,不需要调整
worker_connections 1024;
}
http {
# include 引入另外一个配置文件
# mime.type 用来标记请求头,标记服务器端给客户端发送的文件类型
# 服务器在http请求头中标记返回给客户端的文件是jpg图片还是html文件或者dow下载
# 浏览器根据标记选择对应的展示形式。图片则展示,exe则下载,
# 不是根据文件后缀,而是根据这请求头中的标记,浏览器执行相关操作
include mime.types;
# 不在 mime.types 里面的类型,则都以流的形式发送给浏览器
default_type application/octet-stream;
# 数据0拷贝,减少调度复制过程,不将文件读取到nginx软件内存,
sendfile on;
# 保持连接-超时时间,保持长连接
keepalive_timeout 65;
# 一个主机,虚拟主机,vhost
server {
# 监听的端口号
listen 80;
# 配置域名、主机名称
server_name localhost;
# 域名后面跟随的路径
location / {
root html;
# 如果路径没有匹配上,则展示的默认页面
index index.html index.htm;
}
# 错误页面,500 502 503 504 都转向到 /50x.html
error_page 500 502 503 504 /50x.html;
location = /50x.html {
root html;
}
}
}mine.type文件内容(不全),左侧一列为请求头中标记的参数,右侧为服务器返回的文件后缀:
1
2
3
4
5
6
7
8
9
10
11
12
13
14
15
16
17
18
19
20
21
22
23
24
25
26
27
28
29
30
31
32
33
34
35
36
37
38
39
40
41
42
43
44
45
46
47
48
49types {
text/html html htm shtml;
text/css css;
text/xml xml;
image/gif gif;
image/jpeg jpeg jpg;
application/javascript js;
application/atom+xml atom;
application/rss+xml rss;
text/mathml mml;
text/plain txt;
image/avif avif;
image/png png;
font/woff woff;
font/woff2 woff2;
application/java-archive jar war ear;
application/json json;
application/mac-binhex40 hqx;
application/msword doc;
application/pdf pdf;
application/vnd.oasis.opendocument.text odt;
application/vnd.openxmlformats-officedocument.presentationml.presentation
pptx;
application/vnd.openxmlformats-officedocument.spreadsheetml.sheet
xlsx;
application/vnd.openxmlformats-officedocument.wordprocessingml.document
docx;
application/vnd.wap.wmlc wmlc;
application/wasm wasm;
# 如果是exe类型,则会弹出下载框,让用户选择是否下载。
application/octet-stream bin exe dll;
application/octet-stream deb;
audio/midi mid midi kar;
audio/mpeg mp3;
video/3gpp 3gpp 3gp;
video/mp2t ts;
}如果有一些特殊格式,例如自创mp5格式,希望浏览器以mp4格式来展示播放,则可以在文件中增加一个行类型解析:
1
video/mp4 mp5
实战一:nginx配置两个站点
新建两个文件夹对应两个站点
站点一:
mkdir -vp /root/ningx/wwwtouch /root/nginx/www/index.htmlecho 主站点 > /root/nginx/www/index.html站点二:
mkdir -vp /root/ningx/vodtouch /root/nginx/vod/index.htmlecho 视频站点 > /root/nginx/vod/index.html编辑
nginx/config/nginx.config配置文件1
2
3
4
5
6
7
8
9
10
11
12
13
14
15
16
17
18
19
20
21
22
23
24
25
26
27
28
29
30
31
32
33
34
35
36
37
38
39
40
41worker_processes 1;
events {
worker_connections 1024;
}
http {
include mime.types;
default_type application/octet-stream;
sendfile on;
keepalive_timeout 65;
server {
listen 80;
server_name localhost;
location / {
root /root/nginx/www;
index index.html index.htm;
}
error_page 500 502 503 504 /50x.html;
location = /50x.html {
root html;
}
}
server {
listen 88;
server_name localhost;
location / {
root /root/nginx/vod;
index index.html index.htm;
}
error_page 500 502 503 504 /50x.html;
location = /50x.html {
root html;
}
}
}[出现错误] 无法访问站点,显示错误
Permission denied,完整错误如下:1
2022/04/04 13:44:52 [error] 2578490#0: *3 "/root/nginx/www/index.html" is forbidden (13: Permission denied), client: 221.221.149.3, server: localhost, request: "GET / HTTP/1.1", host: "22.33.44.55"
[解决办法] 查看nginx的启动用户,使用命令
ps -ef | grep nginx,如果不是root,则修改配置文件,在开头增加一行user root,改成为root用启动:1
2user root;
worker_processes 1;重新启动服务
1
systemctl restart nginx
测试双站点效果
在浏览器里面访问
IP:80和IP:88端口查看页面返回的效果。中文乱码
如果index.html里面写的内容是中文则有可能会乱码,需要修改配置文件在
server里面增加charset utf-81
2
3
4
5
6
7
8
9
10
11
12
13
14server {
listen 88;
server_name localhost;
# 这一行内容
charset utf-8;
location / {
root /root/nginx/vod;
index index.html index.htm;
}
error_page 500 502 503 504 /50x.html;
location = /50x.html {
root html;
}
}
实战二:server_name
配合互联网域名进行server_name转发配置配置,以及根据server_name进行匹配转发
进行二级域名映射

修改nginx配置
两个server都监听80端口
两个server的server_name不同,一个是
nginxt1.shuoshuo.live一个是nginxt2.shuoshuo.live,分别指向不同的location/root路径1
2
3
4
5
6
7
8
9
10
11
12
13
14
15
16
17
18
19
20
21
22
23
24
25
26
27
28server {
listen 80;
server_name nginxt1.shuoshuo.live;
charset utf-8;
location / {
root /root/nginx/www;
index index.html index.htm;
}
error_page 500 502 503 504 /50x.html;
location = /50x.html {
root html;
}
}
server {
listen 80;
server_name nginxt2.shuoshuo.live;
charset utf-8;
location / {
root /root/nginx/vod;
index index.html index.htm;
}
error_page 500 502 503 504 /50x.html;
location = /50x.html {
root html;
}
}效果:
访问
http://nginxt1.shuoshuo.live/显示主站点访问
http://nginxt2.shuoshuo.live/显示视频站点匹配顺序以及未匹配上server_name情况。
匹配顺序为从上到下,哪个先匹配上则哪个server生效。
如果server_name没有匹配上,则默认寻找第一个server进行匹配。
server_name多种配置方法
1
2
3
4
5
6
7
8# 一行写多个域名
server_name nginxt2.shuoshuo.live nginxt2.shuoshuo.live;
# 通配符
server_name *.shuoshuo.live;
# 通配符
server_name www.shuoshuo.*;
# 正则匹配
server_name ~^[0-9]+\.shuoshuo\.live$;
反向代理
反向代理、正向代理和隧道模型
反向代理:在互联网中发起请求,使用nginx接受请求,然后把请求转发到内网的应用服务上
正向代理:在内网中发起请求,使用代理服务器,然后把请求转发到互联网环境中。
隧道模型:nginx反向代理即为隧道模型,nginx既要接受用户的请求,也要接受服务端的响应。
DR非隧道模型:参考LVS软件,应用服务器接收到nginx打过来的请求的之后,应用服务器直接向用户发送响应,不再通过nginx转发响应。
反向代理配置
1
2
3location / {
proxy_pass http://www.atguigu.com/;
}配置负载均衡
1
2
3
4upstream httpd {
server 192.168.44.102:80;
server 192.168.43.103:80;
}配置权重
1
2
3
4
5
6
7
8
9
10upstream httpds {
server 127.0.0.1:8050 weight=10 down;
server 127.0.0.1:8060 weight=1;
server 127.0.0.1:8060 weight=1 backup;
}
server {
location / {
proxy_pass http://httpds
}
}down:表示当前的server暂时不参与负载
weight:默认为1.weight越大,负载的权重就越大。
backup: 其它所有的非backup机器down或者忙的时候,请求backup机器。
几种生产环境不使用的负载均衡方法
ip_hash
根据客户端的ip地址转发同一台服务器,可以保持回话。
least_conn
最少连接访问
url_hash
根据用户访问的url定向转发请求
fair
根据后端服务器响应时间转发请求
动静分离
先代理动态请求
1
2
3
4
5location / {
proxy_pass http://127.0.0.1:8080;
root html;
index index.html index.htm;
}代理静态资源
1
2
3
4
5
6
7
8
9
10
11
12location /css {
root /usr/local/nginx/static;
index index.html index.htm;
}
location /images {
root /usr/local/nginx/static;
index index.html index.htm;
}
location /js {
root /usr/local/nginx/static;
index index.html index.htm;
}优化写发,使用正则表达式
1
2
3
4
location ~*/(css|img|js) {
root /usr/local/nginx/static;
index index.html index.htm;
}location匹配顺序
- 多个正则location直接按书写顺序匹配,成功后就不会继续往后面匹配
- 普通(非正则)location会一直往下,直到找到匹配度最高的(最大前缀匹配)
- 当普通location与正则location同时存在,如果正则匹配成功,则不会再执行普通匹配
- 所有类型location存在时,“=”匹配 > “^~”匹配 > 正则匹配 > 普通(最大前缀匹配)
UrlRewrite
实现URL重写
1 | rewrite <regex> <replacement> [flag]; |
实际配置如下,含义为将任意数字组成的url转换成参数,例如:
/123.html转换成/index.jsp?pageNum=123
1 | location / { |
- rewrite 关键字不能省略
- 正则:perl兼容正则表达式语句进行规则匹配
- 替代内容:将正则匹配的内容替换成replacement
- flag标记:rewrite支持的flag标记
flag标记说明:
- last #本条规则匹配完成后,继续向下匹配新的location URI规则
- break #本条规则匹配完成即终止,不再匹配后面的任何规则
- redirect #返回302临时重定向,浏览器地址会显示跳转后的URL地址
- permanent #返回301永久重定向,浏览器地址栏会显示跳转后的URL地址
防盗链
浏览器第一次发起请求的时候,不会在headers里面携带一个referer,
浏览器第二次发起请求的时候,则会携带referer参数,该参数即为浏览器完成的域名,该操作为浏览器执行。
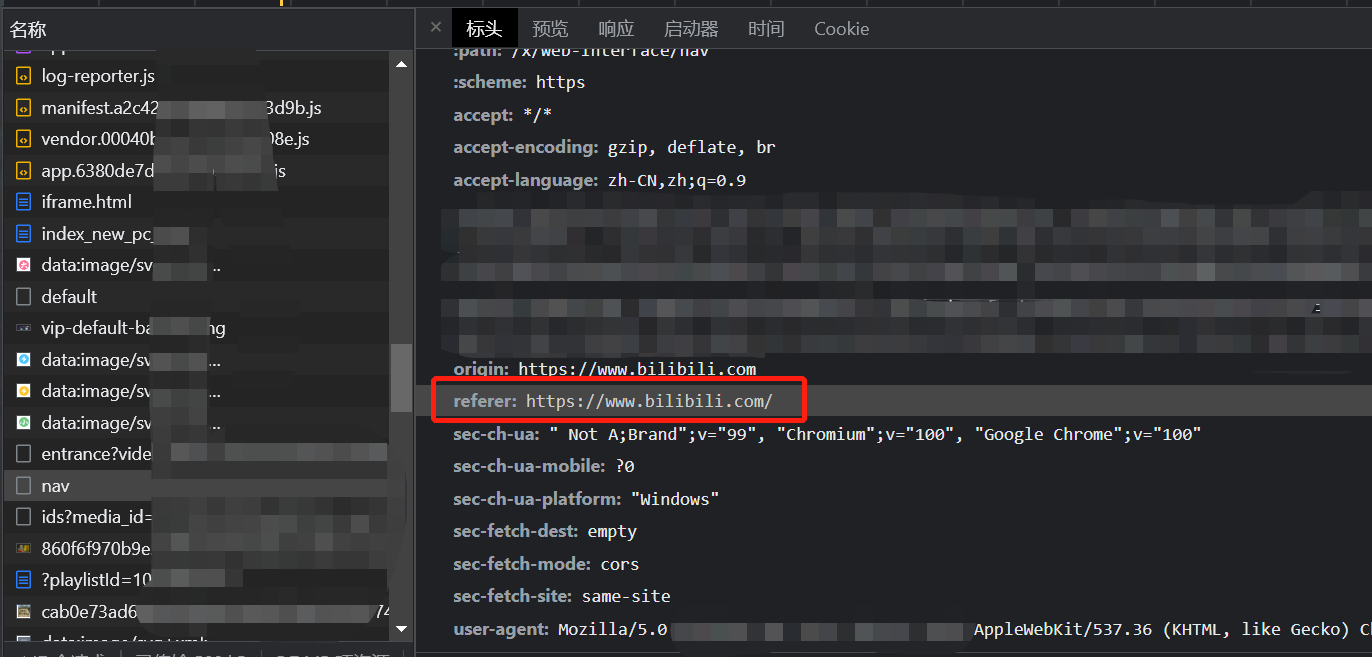
防盗链的实现即为通过判断referer参数,是否为原始站点的数据,如果不是即为非法请求。
如下请求会导致直接访问也不生效,因为第一次访问是没有referers参数的。
1 | location ~*/(css|img|js) { |
修改配置,如果是直接请求图片即无 referers 参数的是配置也允许读取。
1 | location ~*/(css|img|js) { |
使用curl命令
1 | # 大写的I 不显示内容,只显示响应的头信息 |
配置盗链返回.html页面
1 | location ~*/(css|img|js) { |
配置盗链返回指定图片
1 | location ~*/(css|img|js) { |
增加SSL功能,以及SSL配置
如果nginx不支持SSL,即使是在nginx server里面配置好了,nginx会直接报如下错误,解决方法是重新编译nginx并且增加SSL模块
1 | nginx: [emerg] the "ssl" parameter requires ngx_http_ssl_module in /usr/local/nginx/conf/nginx.conf:240 |
一、编译 nginx 的时候增加 SSL 功能模块
1 | 下载最新版ngin(25-Jan-2022 15:11)版本 |
但是如上步骤执行还是会报错:
1 | ./configure: error: SSL modules require the OpenSSL library. |
即使安装了openssl,需要下载 openssl 源码,在编译的是指定源码路径。
openssh官网:https://www.openssl.org/source/
openssh最新版下载地址:https://www.openssl.org/source/openssl-1.1.1o.tar.gz
1 | 下载 |
重新编译,编译的时候增加参数,指定openssl路径,在编译中增加了--with-http_ssl_module --with-openssl=/opt/module/openssl-1.1.1o 两个参数:
1 | ./configure --prefix=/usr/local/nginx --with-http_ssl_module --with-openssl=/opt/module/openssl-1.1.1o |
随后步骤和正常安装一样。
参考资料:
https://www.cnblogs.com/socyli/p/16021113.html
https://www.cnblogs.com/is-possible/p/12744032.html